I have a lab machine that I use to play around with different technology. It runs virtual machines (VM) and backups. The operating system was Windows 2012 R2. If I wanted to manage the VM’s or the backup, I would remote desktop (RDP) to the machine or connect through Hyper-V Manager.
Environment Setup
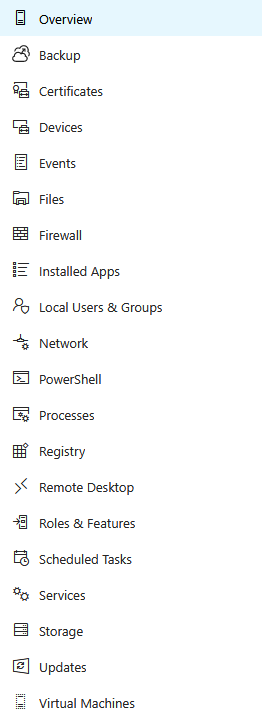
At Microsoft Ignite | The Tour, I learned about Windows Admin Center. It is a FREE browser based server management tool that you run in your local environment. Some of the tasks you can do with Windows Admin Center are: manage VM’s, firewalls, enable or disable roles and features, view events, and backup machines to Azure. All of these tasks are performed through PowerShell. It is also extensible, so if you know PowerShell, you can create your own tools!

I wanted to try out Windows Admin Center to manage the VM’s on my lab machine. To start, I wanted to upgrade from Windows 2012 R2. Since this machine only hosts VM’s, I decided to use Microsoft Hyper-V Server 2016. Hyper-V Server “contains only the Windows hypervisor, a Windows Server driver model, and virtualization components”. Like Windows Server Core, it does not have a GUI. Unfortunately, my lab machine hardware is old and does not support Second Level Address Translation (SLAT) that is required for Hyper-V Server 2016, so I had to use Hyper-V Server 2012 R2.
After installing Hyper-V Server you boot to a menu screen. From here I installed all of the updates. I would recommend installing the updates before proceeding with your setup. RDP and Hyper-V Manager from Windows 10 will not work without the latest updates. Once the updates were installed, I enabled RDP. To add my machine to the Active Directory domain, I needed to start my domain controller VM.
The other disks in my machine were offline after the install. From the menu screen, I chose Exit to Command Line. This will open a command prompt window. I prefer PowerShell for command line operations. You can default to PowerShell with the following commands:
Set-ItemProperty -Path "HKLM:\SOFTWARE\Microsoft\Windows NT\CurrentVersion\Winlogon\" -Name Shell -Value "powershell.exe"
Restart-Computer -Force
You can view your disks using: Get-Disk. Use the disk number to set the disks online and writeable, with the following commands:
Set-Disk -Number {disk number} -IsOffline $False
Set-Disk -Number {disk number} -IsReadOnly $False
With the disks online, I had to setup the Hyper-V VM Switch. To get a list of network adapters run: Get-NetAdapter. Use the network adapter name with the following commands:
$net = Get-NetAdapter -Name {net adapter name}
# this creates an external switch. Use SwitchType to specify either Internal or Private
New-VMSwitch -Name {VM switch name} -AllowManagementOS $True -NetAdapterName $net.Name
To import the VM, I first needed to get a compatibility report. You can get a compatibility report with the following command: Compare-VM. Incompatibilities will be listed as an array of id’s. You can select and view the incompatibility with the following command:
$report = Compare-VM -Path {path to machine configuration xml}
$report.Incompatibilities[{array index}]
One incompatibility I had was id 33012 which is a VM switch incompatibility. To resolve the issue, I ran the following command:
$report = Compare-VM -Path {path to machine configuration xml}
$report.Incompatibilities[0].Source | Connect-VMNetworkAdapter -SwitchName {VM switch name}
# this is to show the change that was made
$report.Incompatibilities[0].Source
You can now import and start the VM with the following commands:
$vm = Import-VM -CompatibilityReport $report
Start-VM -VM $vm
Now that my Active Directory domain controller VM has started I can join it to the domain. I could either do that through PowerShell with the Add-Computer command or return to the menu screen with the command: sconfig
Before I create the VM that will run Windows Admin Center, I installed Windows Management Framework 5.1 to update the PowerShell version to 5. Make sure any VM’s that you want to administer are also running PowerShell version 5. You can confirm your version with the command: $PSVersionTable.PSVersion. I connected to the Hyper-V Server via Hyper-V Manager from my Windows 10 desktop to create the VM (could also be created with PowerShell) and installed Windows Server Core 2019. Booting into Windows Server Core is similar to Hyper-V Server in that you are presented with a command prompt. You can get to the menu by running the command: sconfig. Again I enabled RDP and joined the machine to the Active Directory domain.
During the Windows Admin Center installation, you are asked to either generate a certificate or provide a certificate thumbprint. I generated a certificate with the following commands:
Get-Certificate -Template {certificate template} -DnsName {dns name} -CertStoreLocation cert:\LocalMachine\My -Url ldap:
# to confirm your certificate was added and get the thumbprint
Get-ChildItem -Path cert:\LocalMachine\My
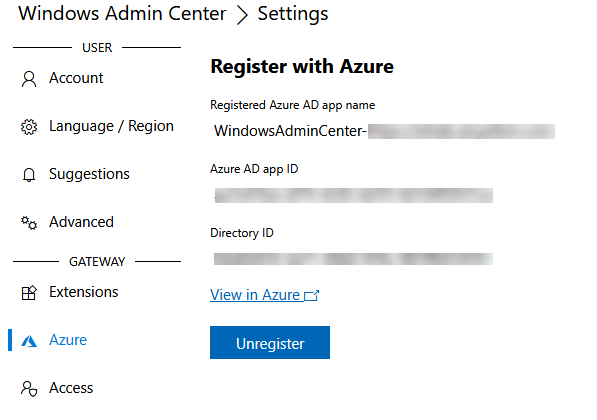
Installing Windows Admin Center is very quick and straight forward. When you log in, you can start adding your server and desktop machines. Click on the Settings gear icon, and you can register you Windows Admin Center as an Azure AD app to backup your servers.

Backups
From the home screen in Windows Admin Center, click on one of your managed servers. In the Tools menu, click on Backup. This will guide you through setting up the agent on the machine and backing up to Azure.
Step 1: Login into the Microsoft Azure portal
Step 2: Set up Azure Backup
Select your Subscription, the Vault (or it will create a new one), Resource Group, and Location
Step 3: Select Backup Items and Schedule
Depending on what you select to backup it will calculate the total backup size. You use this to get a rough calculation of costs to store the backup.
Step 4: Enter Encryption Passphrase
This is the passphrase that is used to encrypt your backup. In order to decrypt in the event you need to restore, you will need this passphrase so keep it safe!
Click on Apply to start the setup.
The backup creates a “Scratch” directory in the Microsoft Azure Recovery Services Agent install folder in Program Files to prepare the backup. If your drive is not large enough, the backup will fail. To fix this, create a second drive and attach it to your VM. Log into the server being backed up and run the following command:
Net-Stop obengine
#Copy the "Scratch" folder from Program Files\Microsoft Azure Recovery Services Agent\ to the new location
# check both keys first with Get-Item
# Get-Item -Path "HKLM:\SOFTWARE\Microsoft\Windows Azure Backup\Config\"
Set-ItemProperty -Path "HKLM:\SOFTWARE\Microsoft\Windows Azure Backup\Config\" -Name ScratchLocation -Value "{new scratch location}"
Set-ItemProperty -Path "HKLM:\SOFTWARE\Microsoft\Windows Azure Backup\Config\CloudProvider\" -Name ScratchLocation -Value "{new scratch location}"
Net-Start obengine